Calendly appointment scheduling helps companies streamline the process of booking meetings and managing appointments. Calendar booking solutions can simplify scheduling, reduce no-shows, and ensure that meetings are efficiently organized.
Appointment scheduling templates for Calendly empower businesses to automate their scheduling needs, close deals faster, and build stronger relationships. This raises productivity across all departments and accelerates business growth.
Additional benefits:
- Seamlessly manage appointments: Automated scheduling reduces back-and-forth communication to keep meetings organized.
- Customize scheduling preferences: Set specific availability, buffer times, and appointment types to match your business needs.
- Integrate with calendars: Sync with your existing calendar systems to avoid double bookings and ensure all meetings are captured accurately.
Adding an AI chatbot for Calendly scheduling creates a seamless, automated experience. The Kore.ai XO platform is open and agnostic, which means you can integrate its AI features with any system–including Calendly.
Below is a guide on how to get started:
Sign up for a Kore.ai account
The first step is to sign up for an account on the Kore.ai XO Platform.
Once signed in, select ‘New App’ to start your AI Chatbot build
Begin your new app project by selecting Automation AI. Once you’ve chosen, select ‘Custom Setup’ and follow the prompts to build your AI chatbot.
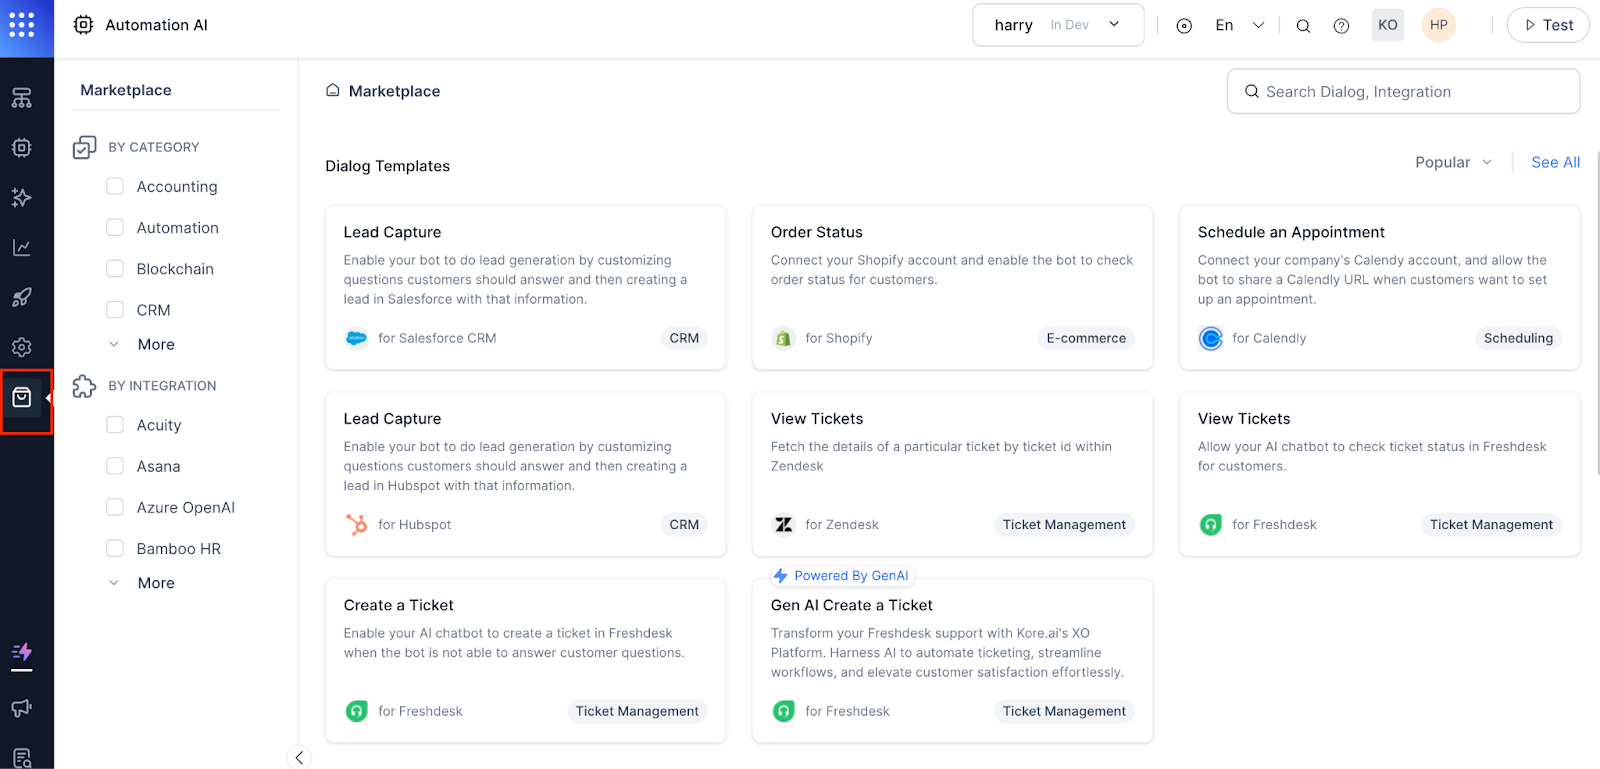
Navigate to the marketplace and add the Calendly integration
Select ‘integrations’ from the dropdown menu. From there, you can configure Calendly including instructions and authorization.
Authenticate and install
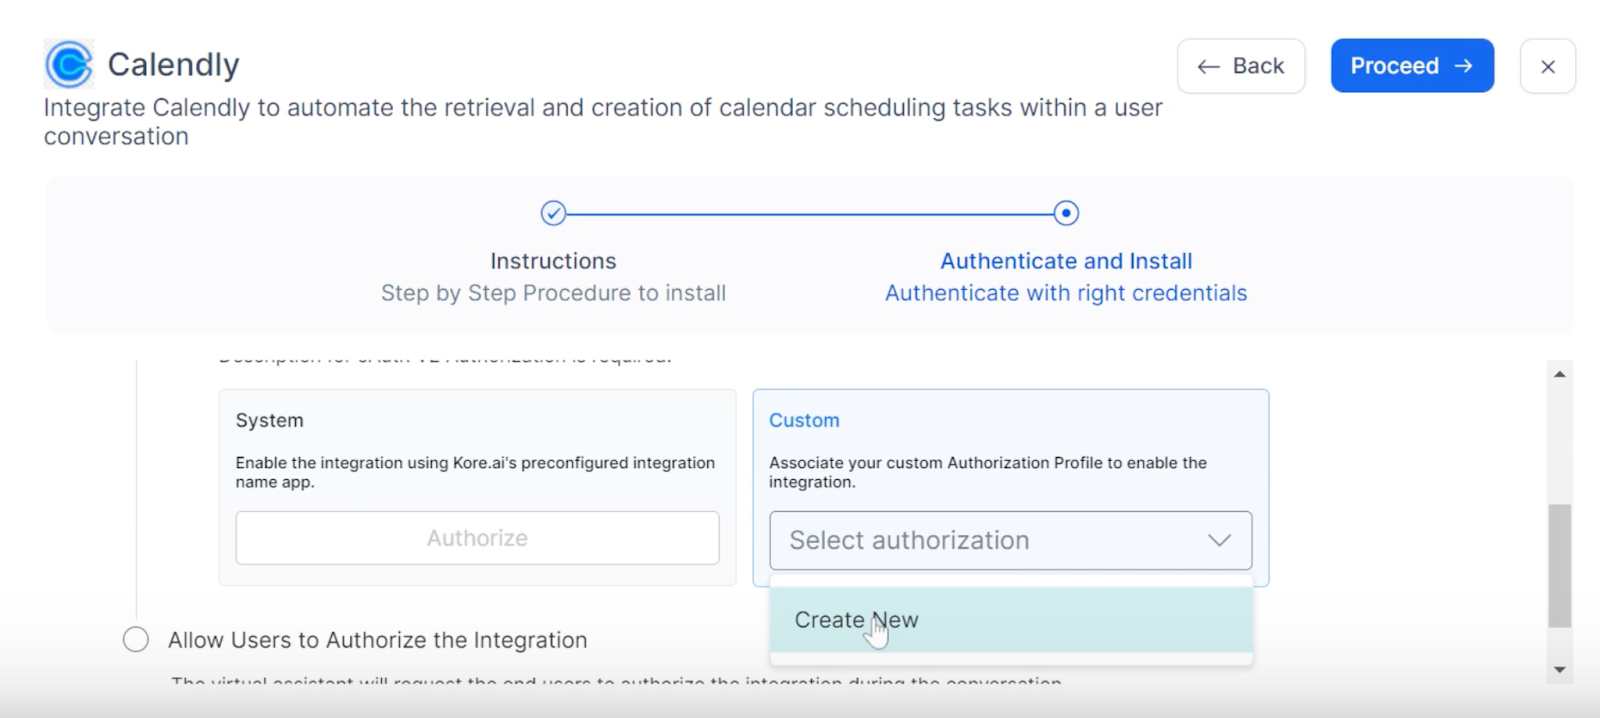
After you add the Calendly integration, follow the step-by-step instructions and proceed to ‘Authenticate and Install.’ Under Custom authorization, select ‘Create New’ from the dropdown menu.
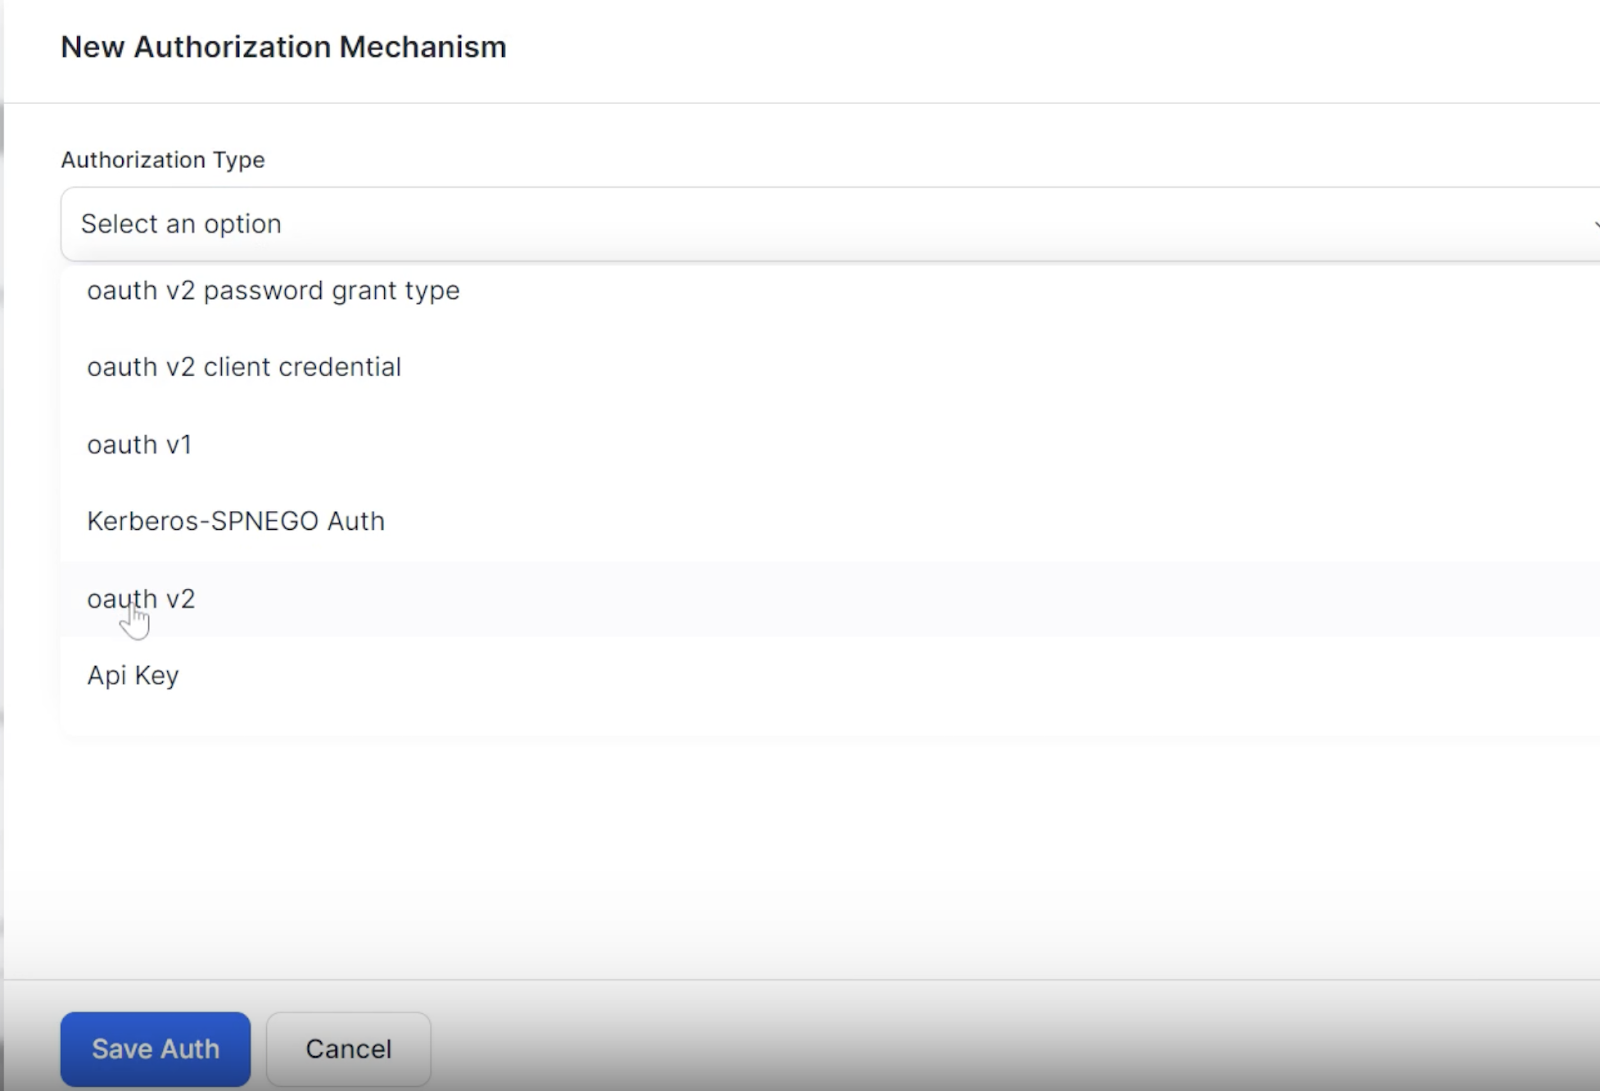
You will be instructed to select a New Authorization Mechanism. You can use the ‘oauth V2’ authorization type for this integration.
Enter the Identity Provider Name (Calendly), Client ID, Secret Key, Authorization URL, Token Request URL, and Refresh Token URL. Save your authorization with the blue button at the bottom of your screen.
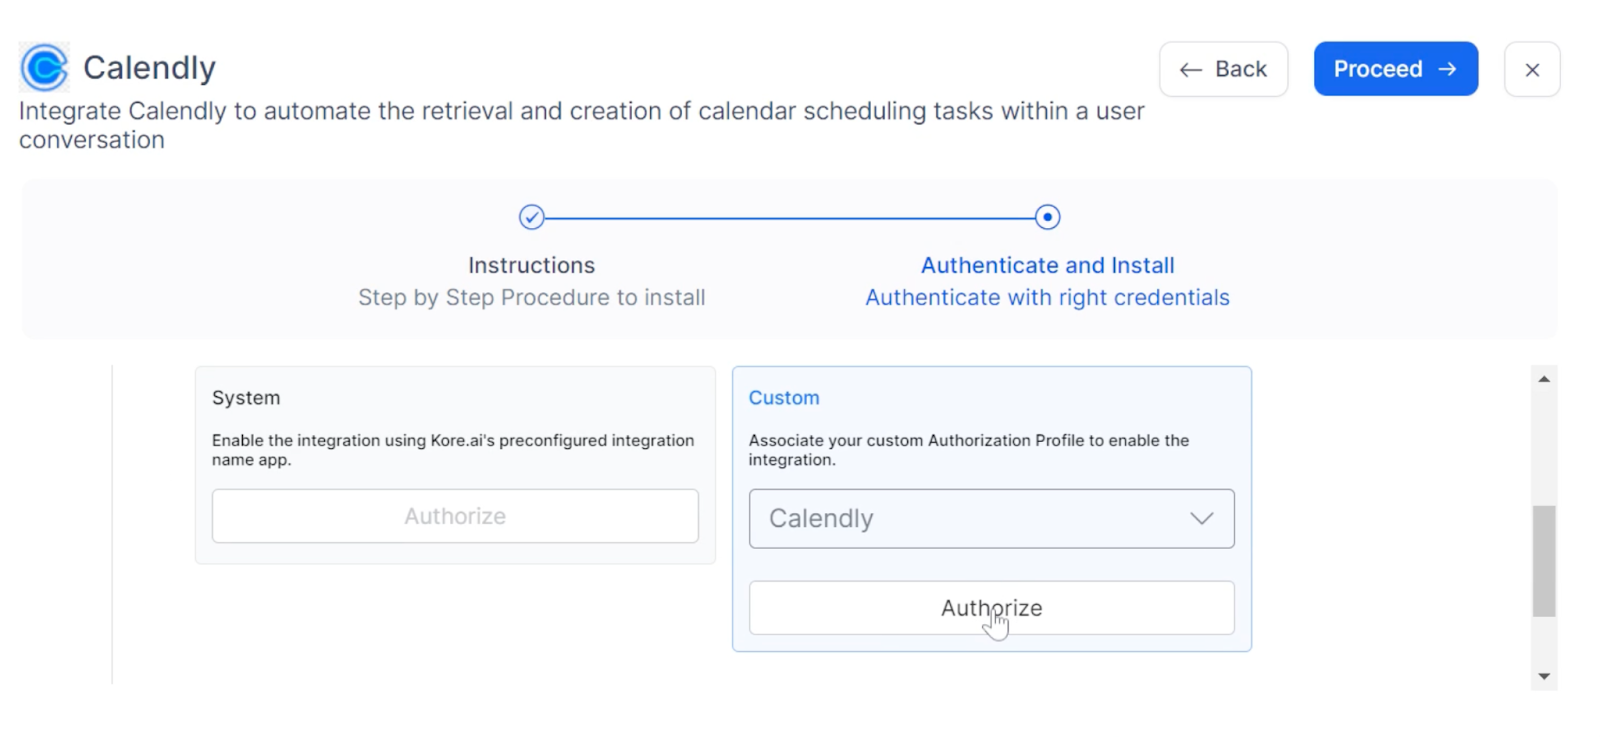
Authorize your Calendly integration
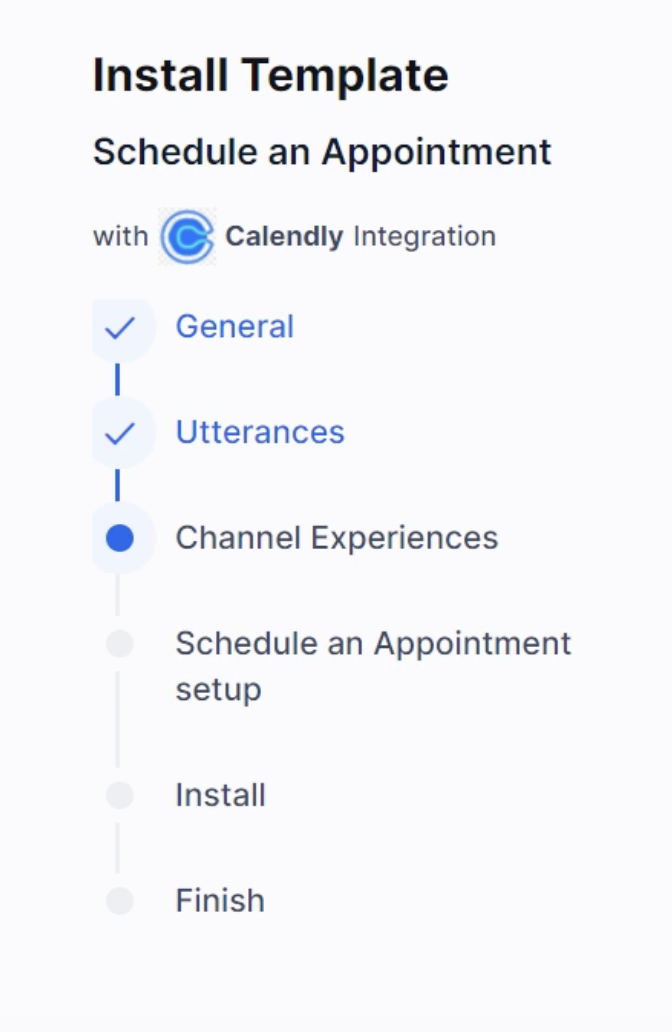
Follow the install template
Progress through the guided steps to finalize your template integration. Ensure the name of your meeting matches the name of the booking in Calendly.
Test your new AI chatbot integration
After the template installation, you’ll be brought to the Dialog page. Click ‘Test’ in the upper right-hand corner of your display. You will be given the option to select a Voice or Chat Conversation for testing the flows.
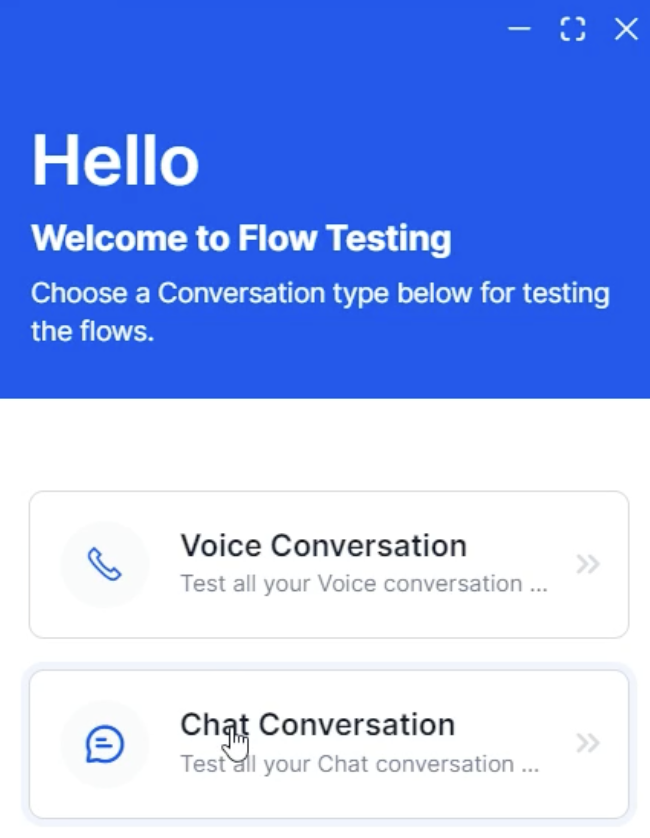
For this example, we’ll focus on Chat Conversation. Once selected and your AI chatbot pops up, ask it to create a meeting. You can even simply type, ‘CreateMeeting.’

Click ‘Book my meeting’ to add the date, time, and meeting details. Then, click ‘Schedule Event.’ The AI will automatically create a Calendly meeting for you.
Confirm your integration is working
While logged into Calendly, you can view the calendar events created by Kore.ai. Feel free to run tasks like schedule, edit, and synchronize, easily and efficiently from a unified platform.